Chapter 1 • Moss Grotto
Espacio Publicitario (banner)
Chapter 1: Moss Grotto – Comprehensive Main Story Walkthrough
Overview & Progression Goals
- Zone Name: Moss Grotto
- Objective: Escape the underground cavern, establish the initial checkpoint at Ruined Chapel, defeat Moss Mother, and reach the surface outpost of Bone Bottom.
- Estimated Clear Time: 6 to 9 minutes.
- Required Upgrades: None (Base Needle and Thread Bind mechanics only).
Map & Route (Mandatory)
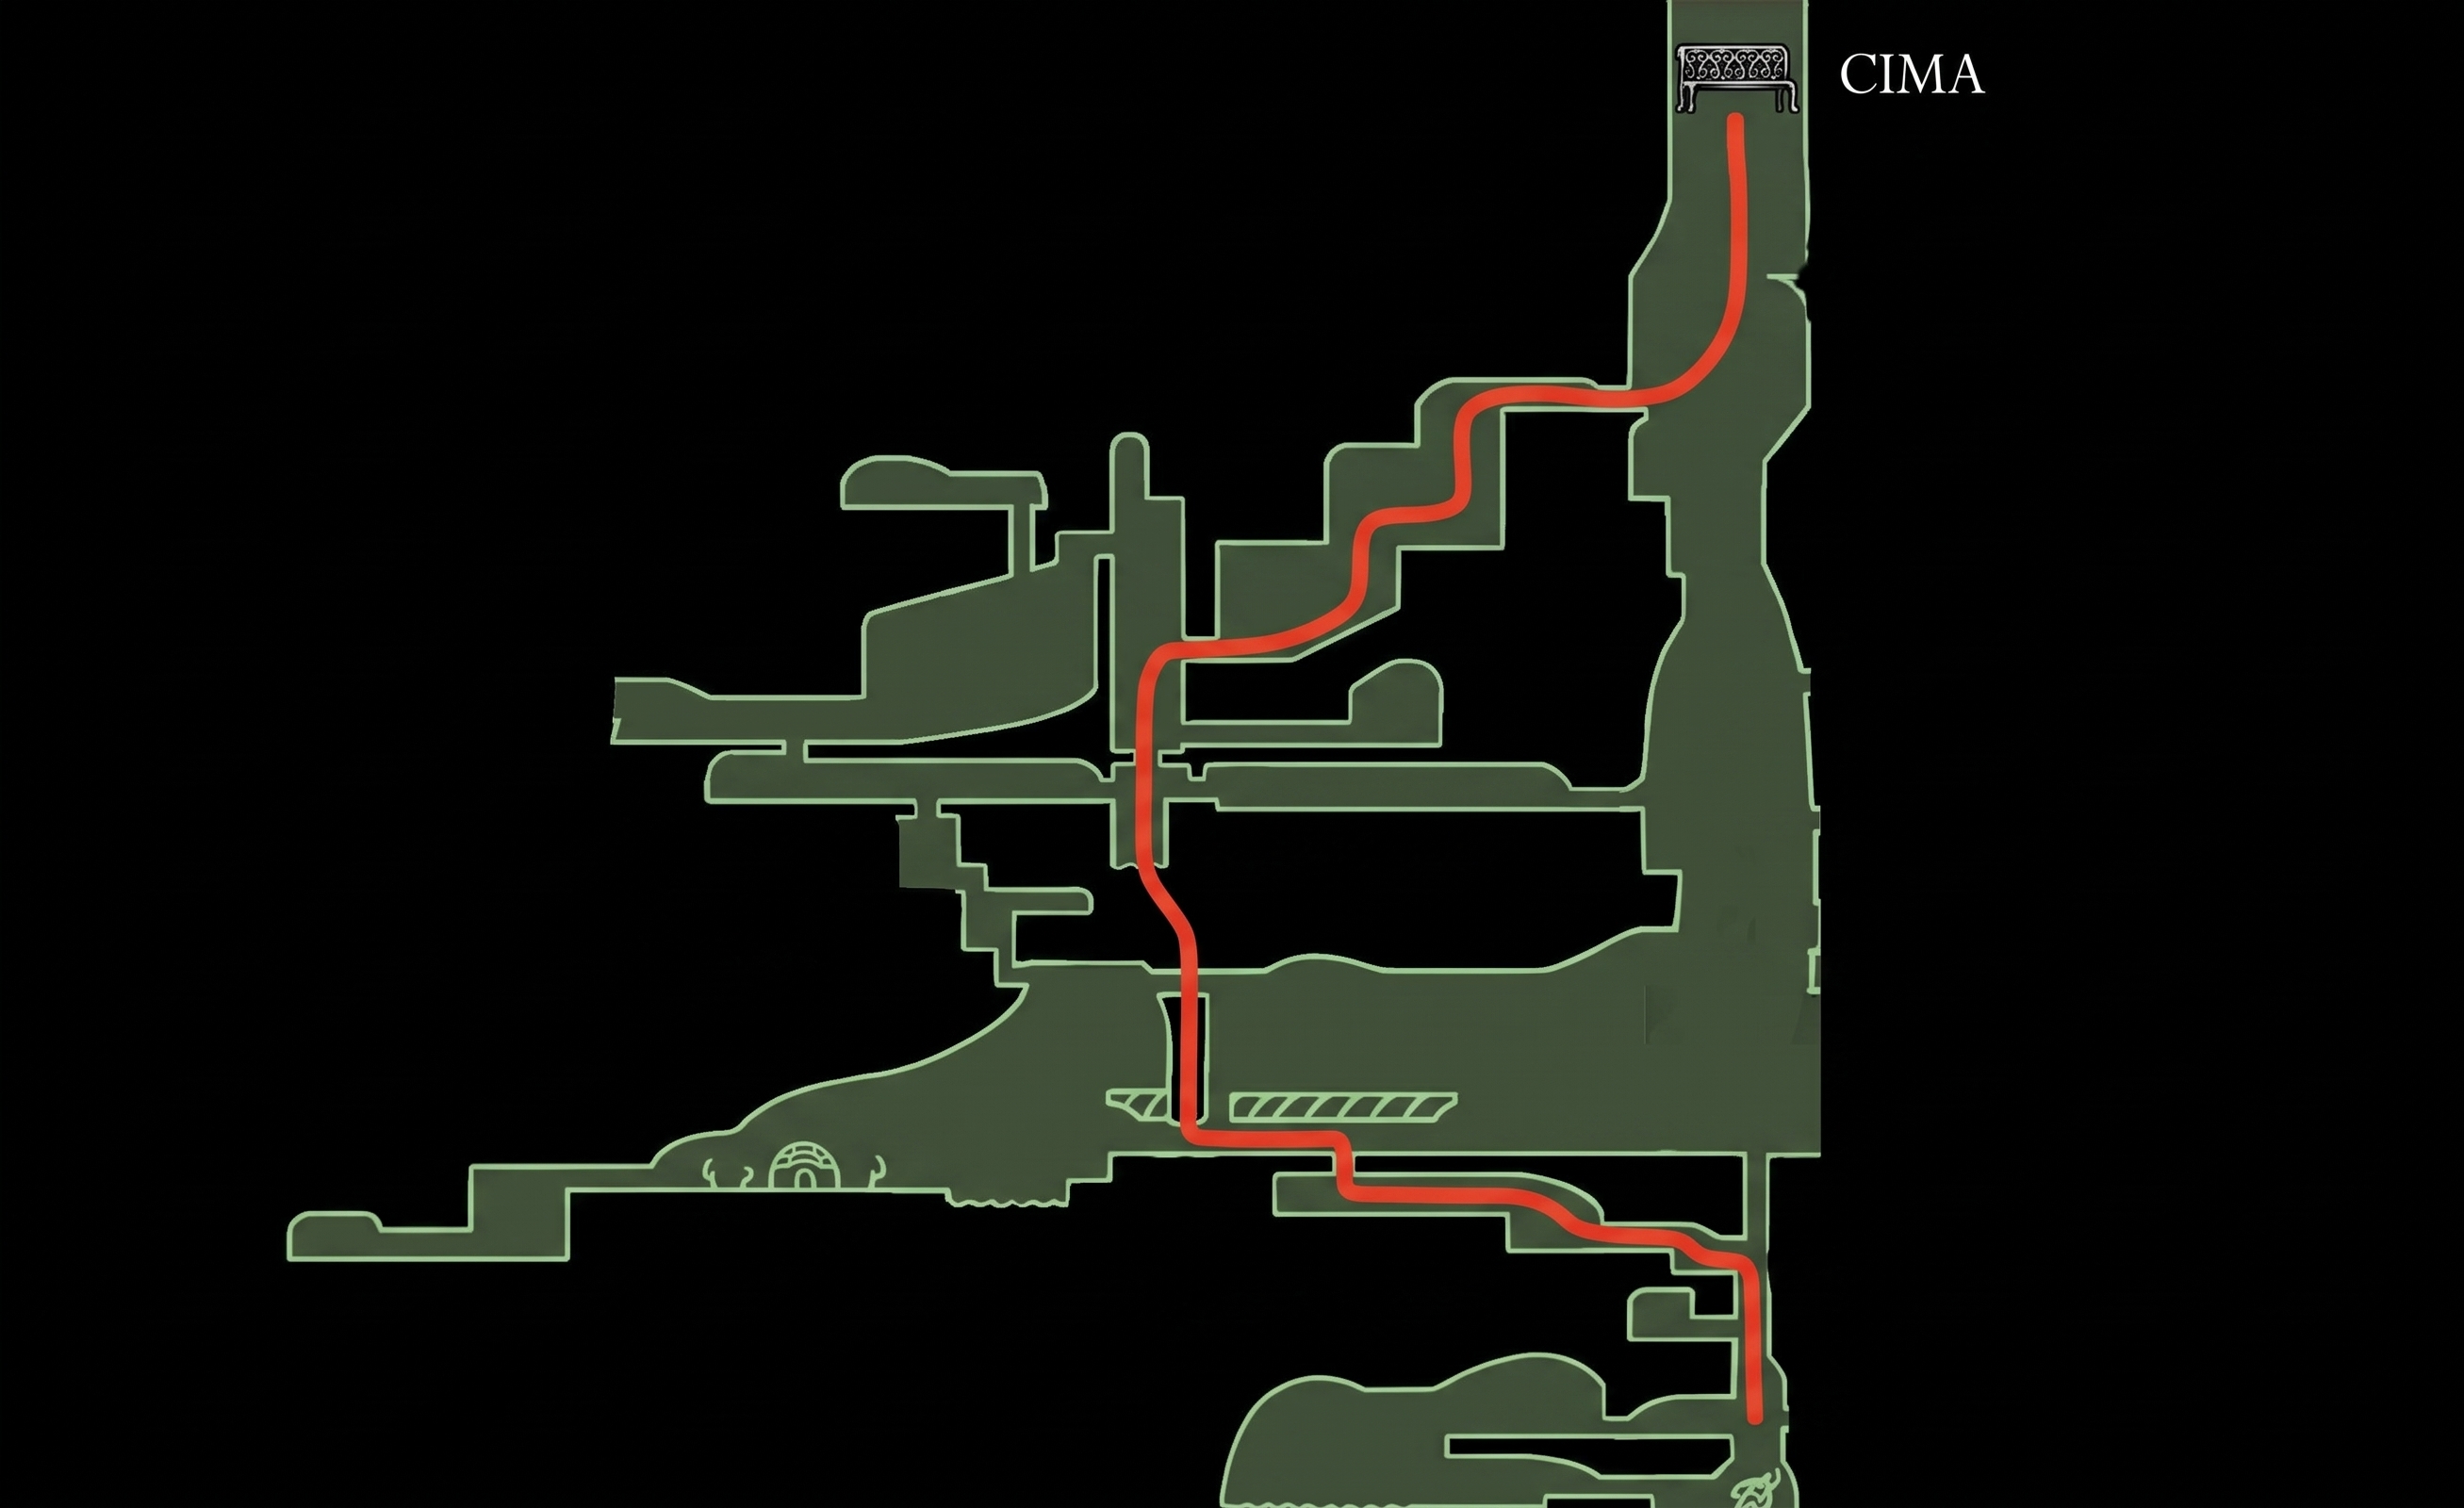 Route Summary: Climb straight up from the entrance to the top, ignoring side paths.
1. Starting Abyss: Chasm of Awakening
After Hornet’s transport cage shatters, you regain control at the bottommost pit of Farloom.
- Movement Basics & Muscle Memory:
- Move right through the shallow water pool. Familiarize yourself with Hornet’s jump trajectory, which is faster and has slightly more float than the Knight’s jump in the original game.
- Slash through the green foliage barriers blocking the cave exit. Each vine cluster takes one basic strike.
- Silk Harvesting:
- Two Mossgrubs (small crawling bugs) appear along the lower platforms. Strike them to harvest thread into your Silk Spool.
- Rule of Thumb: Keep your spool completely filled (8 hits) at all times. Hornet’s Bind ability restores 3 full masks in a rapid burst, but requires an entire spool to trigger.
- The First Vertical Shaft:
- Jump across the collapsing moss platforms. Do not pause on the green lichen ledges, as they give way 1.5 seconds after contact.
- Cut the dangling cocoon on the right to grab your first bundle of Rosaries (currency).
2. Navigating the Mid-Caverns & Hazards
The path now forks; take the strictly mandatory main line:
- The Bone Bridge:
- Cross the giant calcified ribcage heading eastward. A flying Mossmir will descend from the stalactites.
- Counter Strategy: Wait for the creature to dive downward. Do not jump straight up into it; take one step backward, swing upwards to swat it, or jump slightly above it and use Hornet’s diagonal downward strike (pogo) to bounce off its carapace and gain height.
- Bypassing Lower Side Chambers (Wormways Bypass):
- You will see dark tunnels descending to the bottom-left marked with skull warnings. Completely ignore these pits. They lead into the hazardous Wormways, an optional labyrinth that will drain your health and waste 10–15 minutes.
- The Hanging Vine Lift:
- Scale the wall on the right by performing wall jumps (pressing jump while sliding down stone surfaces).
- Strike the rusted counterweight pulley overhead. This permanently drops a rope shortcut, ensuring that if you fall, you can climb back up in two seconds without repeating the lower platforming.
3. Pre-Boss Mandatory Checkpoint: Ruined Chapel
Before heading into the upper cavern, do not miss the only safety checkpoint:
- Locating the Bench:
- At the top of the vertical shaft, head left through a cracked stone archway overgrown with moss bells.
- Inside lies the Ruined Chapel. The bench is directly in the center of the chamber.
- Action Required: Sit on the bench to set your respawn anchor and fully replenish any lost masks. Skipping this bench means dying against the boss will force you to replay the entire chapter from the initial wreckage.
- Chapel Maid Interaction (Fast Advance):
- An NPC (the Chapel Maid) stands to the left of the bench. Speaking with her is optional, but pressing through her dialogue unlocks early context on the Pilgrimage route.
4. Boss Strategy: Moss Mother (Area Guardian)
Exit the Ruined Chapel to the right, climb the ledge above the doorway, and cross into the grand vaulted chamber to trigger the boss cutscene.
Boss Overview
- Health Pool: Moderate (~180 HP).
- Damage Dealt: 1 Mask per direct hit or debris strike.
- Arena Layout: Flat stone platform bordered by thorny brambles on both extreme edges. Stay firmly in the center third of the room.
Attack Patterns & Exact Counters
| Attack Name | Telegraph (Visual / Audio Cue) | Dodge Mechanic | Punish Window |
|---|---|---|---|
| Swooping Stinger | Rears back into the upper corner of the arena and screeches loudly. | Jump vertically just as she begins her downward flight path. | Perform a diagonal downward needle strike on her back. This resets your jump and lands a safe hit. |
| Ceiling Slam | Flies directly upward into the stone roof, vibrating the entire cavern. | Watch the ceiling for falling dust particles and sprint horizontally away from them. | Stand beneath the clear gaps between falling stalactites and charge your needle for her descent. |
| Spawn Hatchlings | After hitting the ceiling, she periodically drops 1 to 2 egg pods. | Immediately rush the pods before they hatch, or strike the larvae the moment they emerge. | One strike kills each larva instantly, granting you free silk to keep your spool primed. |
Healing Optimization (Bind)
- Never heal while Moss Mother is airborne: Her flight speed makes mid-air healing vulnerable.
- Stagger Window: After sustaining roughly 12 to 14 needle hits, Moss Mother will crash to the arena floor, stunned and panting for approximately 3.5 seconds. Use this exact moment to trigger Bind to restore 3 masks immediately, then squeeze in two forward strikes before she recovers.
5. Post-Fight Ascent to Bone Bottom
- Exit Path: Once Moss Mother falls, the thorn barricade on the upper-left of the arena permanently retracts.
- Climbing the Ascent Rope:
- Leap onto the dangling chain/rope on the left wall. Climb upward, jumping across to the wooden scaffolding.
- Transition Gate:
- Break the wooden support beams holding the exit gate.
- Walk out of the cave mouth to transition directly into the rocky surface settlement of Bone Bottom, concluding Chapter 1.